Wednesday, February 16, 2005
Thursday, February 03, 2005
Tuesday, February 01, 2005

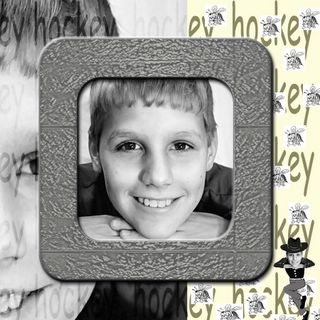
Ian's Scrap Book Page

I know it is not stitchy but it is a good example of the use of layers. This image is composed of one photo used three times (resized using the move tool) I used a background fill for the yellow bit on high transparency. Words were added and blended on the layers palette. The slide frame is simply a shape from within Elements with added texture and a drop shadow (layer styles). The bees were clip art from the internet. Everything is on different layers with different effects.

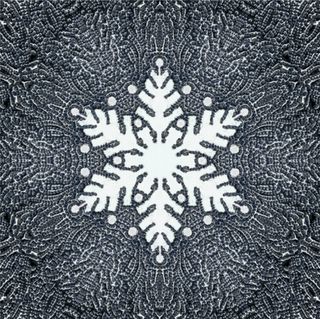
This image is the improved snowflake that I used for my Christmas cards. I did the first one very quickly the night before the EG meeting, but this one took a bit longer. It was embroidered on a coke can, scanned and then copied and pasted 12 times with a bit of flipping. Then I touched it up to clean up the flake.

Sketch Book Notes
Sketch book Pages 5/2/05
Liz Welch
Creating pages for you own sketch / scrapbook is rewarding and fun. Below are some pointers to remind you and guide you through creating pages. At the May meeting Chrissie will be covering ideas for making up the books and adding words.
Preparation
Scan in items, more than one up on the screen, you can select and cut and paste into your pages at will.
Consider the size and shape of the sketch book you want to end up with.
Beginning the pages
Choose page size (image/ resize/ image size) and the resolution (300dpi is fine). Some times I make the canvas size bigger than my finished page to allow for cropping and positioning.
Background layer
This can either be something from your source material or a bucket fill or pattern from within the programme.
Bring in the first object
Select something from your scanned objects using the appropriate tool (often the magic wand will do, remember to set the tolerance levels and whether you want it to be contiguous) Any background you include will be visible in the sketchbook page, so take care to select only the bits you want.
Cut and paste into the new page, it will appear as a new layer (open the layers palette and keep it on the desk top by dragging it onto the work area). If you have selected an Image with no background detail then you will see a checkerboard in the layer which indicates transparency.
Label the layer by double clicking on the box to the right of the eye in the palette.
Manipulate as you choose
Scale changes – move tool, drag out corners/ sides, rotate etc
Apply filters
Apply blending modes
Apply layer styles
Consider the opacity of the layer
Subsequent Layers
Select, copy and paste in any other objects, type text, paint, draw shapes etc
Consider all of the possible manipulations plus try changing the order of layers by dragging and dropping in the layers palette.
Use the Tools Menu
Eraser set to 15% (approx) (don’t forget that you have a huge choice of brush options) is a useful tool to gently rub away areas of a layer to reveal or more subtly blend in opaque layers
Burn And Dodge tools enhance the areas that you choose, not the whole layer.
Blurring and reducing the saturation can also be effective.
The selection tools allow you to choose which parts of a layer you adapt.
Working with layers
· Naming layers will reduce confusion
The layer you are working on is the one highlighted with blue.
Layers with no eye visible are hidden, click on the layer (in the palette) to make it visible again
If nothing appears to be happening when you use a tool on a layer check that
1. You are on the layer you think you are.
2. You have no selection active – go to select/ deselect. Even if you can’t see the actual selection on screen, if the deselect option is not greyed out then you actually do have a selection there, so get rid of it.
· Use the Select All/ edit/ copy merged/ edit/ paste to create a fresh layer which contains all of the images and effects of the layers beneath it (you can choose which layers to include by blinking out the eyes on the layers you don’t want included). You can blink out all the lower layers and work on creating new layers above, in the knowledge that your lower layers are safe NB this does not preclude the need for regular saving of your files in case of a crash.
Ready to Print
When the page is finished make sure it is the right size for your sketchbook page (image/ resize/ image size).
If you are not intending to revisit the page and make changes then merge the layers or flatten the image to reduce the file size. Save it in whatever format suits, eg Tiff or jpeg. (PSD files are bigger and some image viewers won’t open them)
If you think you might want to change it at a later date, merge just those layers that you know you don’t want to mess with and save it as a PSD file (all your layer info will remain) I often have both a PSD and a Tiff of the same image.
Print out onto suitable paper, there are many art papers besides the normal photo papers available including watercolour, pastel paper, canvas and various textures, besides the option of fabric, tissue, acetate, shrink plastic, transfer paper, velvet paper etc. (visit www.craftycomputerpaper.co.uk for a few ideas)
Subscribe to:
Comments (Atom)


