Sunday, July 24, 2005
Sunday, May 29, 2005


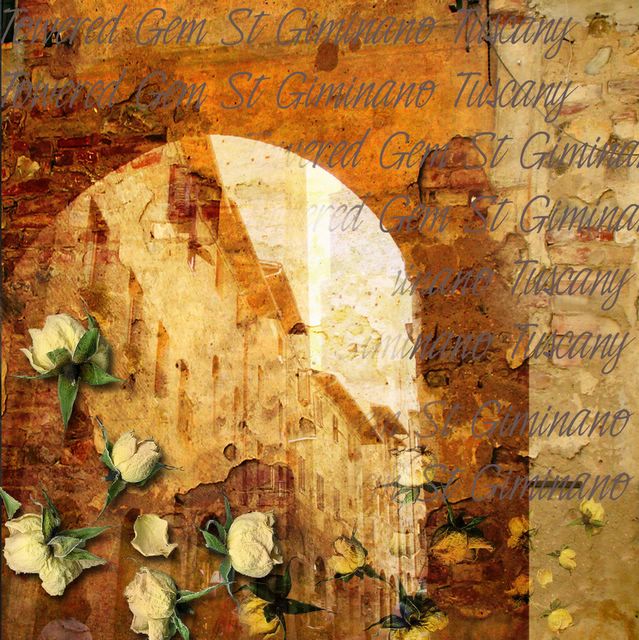
WICKED WORDS
Saturday May 28th 2005 - Excercises
We had a very good and productive day on Saturday, so for those of you that were unable to be there here are the notes/ exercises for the session. If you missed it, then have a go at these exercises and learn a little about using text in Elements 2. NB some tools are not available in Elements one (mask brush), and I don't know what else is on offer in PE3 as I don't have it.
Signature Art
- Write your signature large and clearly in dark pen on clean white paper for maximum contrast.
- Scan it in
- Open in Elements and make a duplicate layer, blink out the lower layer
- Use the magic wand tool set to a tolerance of 2 and contiguous un ticked, to select the white background and then delete the white.
- Save your file
- Drag and drop or copy and paste the signature without the white background into another file
- Make duplicate layers
- Rotate, mirror, change the scale, distort and move the layers to create a design.
- Use select all / copy merged/ paste to copy all the layers of your design into a new layer.
- Blink out the layers below
- Colour as you wish using either the paint brush or the flood fill tools.
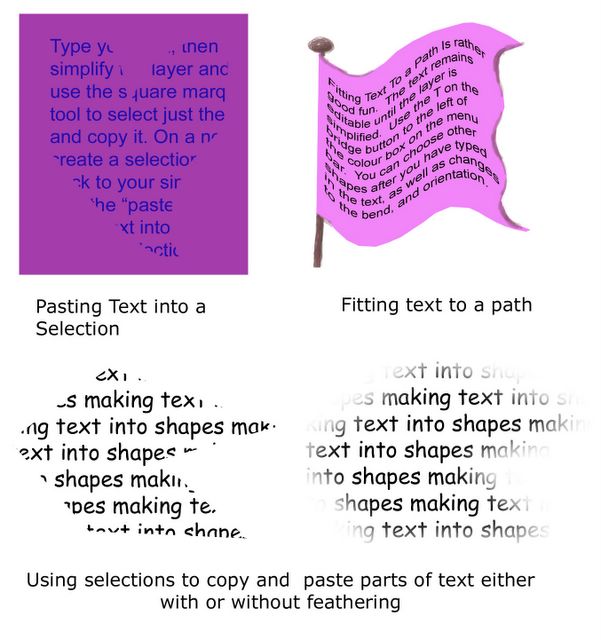
Text Pasted in to a Selection - Create a new file with a transparent background
- Type your text
- Simplify the layer (no longer editable, just dots on a screen like a picture)
- Create a new layer
- Use the lasso tool to draw a shape and save the selection (select / save selection)
- Return to your simplified layer and select the text using the square marquee (0 feathering) and copy it.
- Go back to the new layer and load the selection (select / load selection)
- Use the edit / paste into command and then deselect and your text should appear in the shape.
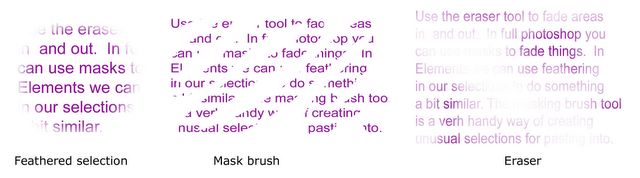
Vignette Text - Create a new file with a transparent background
- Type your text
- Simplify layer
- Use the eraser tool set to a soft blurry brush at low opacity to erase parts of the text
- Copy and paste the simplified layer
- Use the selection brush tool (don't forget all the myriad brush options available) to select parts of the text
- Either copy and paste this on to another layer, or use the select / inverse and then delete to remove the unwanted parts.
- Copy and paste the simplified layer again.
- Use the circular marquee with a feathering of at least 20 to select part of the wording and paste it into a new layer
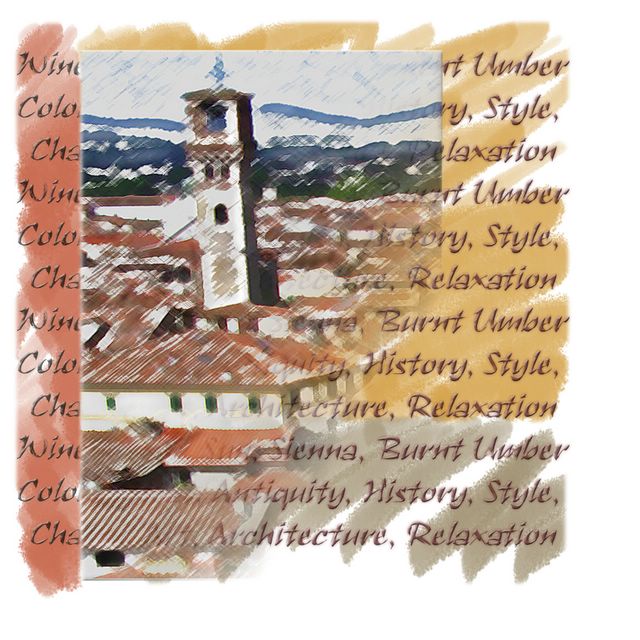
Text Masks - Open an image that you want to use (always make a copy of your background layer) Use the text mask tool (T with marching ants) to type in a word in a bold and large font, the image will be masked with red
- Copy and paste your selection into a new layer
- Move, stretch, distort, scale, your words
- Try layer styles such as bevel and emboss
Or
- Instead of typing your text mask directly on the copy background layer, type it into a new layer
- Use the eyedropper tool to pick up colours from the image below and paint them in to your text selection
Fitting Text to a Path
The text remains editable until the layer is simplified. - Create a new file with a transparent background
- Select the text tool and choose your font
- Press the T on the bridge button to the left of the colour box on the menu bar. And select the style you want
- Start to type and your words will appear along the style of path that you have selected.
- You can choose other shapes after you have typed in the text, as well as changes to the bend, and orientation.
Tips:
Remember to blink out lower layers or you will not see what you have done.
Add in a background layer flood filled with a solid colour if you want to see more clearly the effects you have achieved.
When using feathering remember that if you over feather you may not have any pixels left to select. Eg. Text typed at 8 points with a small selection and a very high feathering (150) might leave you nothing in the selection to copy and paste and an warning message appears.
Saturday, March 12, 2005
Go See This Exhibition
Waterstones has a great exhibition on at the moment by an artist called Jill Perry. She has recorded a year in her life in the form of a visual diary. Each day takes up a small square and has a short sentence associated with it. The entries are sometimes painted, or collaged, sculpted and stitched, or photographed, or drawn. It is a moving, intimate, vibrant and inspiring exhibition which might give you inspiration for your own sketchbook pages. The exhibition runs until 2nd April in the Bridlesmith Gate Gallery, which is a lovely space on the fourth floor of Waterstones. Along side the visual diary are a number of her detailed and slightly surreal paintings which are a pleasure in themselves. Go and see it, you won't regret it.
Wednesday, February 16, 2005
Thursday, February 03, 2005
Tuesday, February 01, 2005

Ian's Scrap Book Page
I know it is not stitchy but it is a good example of the use of layers. This image is composed of one photo used three times (resized using the move tool) I used a background fill for the yellow bit on high transparency. Words were added and blended on the layers palette. The slide frame is simply a shape from within Elements with added texture and a drop shadow (layer styles). The bees were clip art from the internet. Everything is on different layers with different effects.
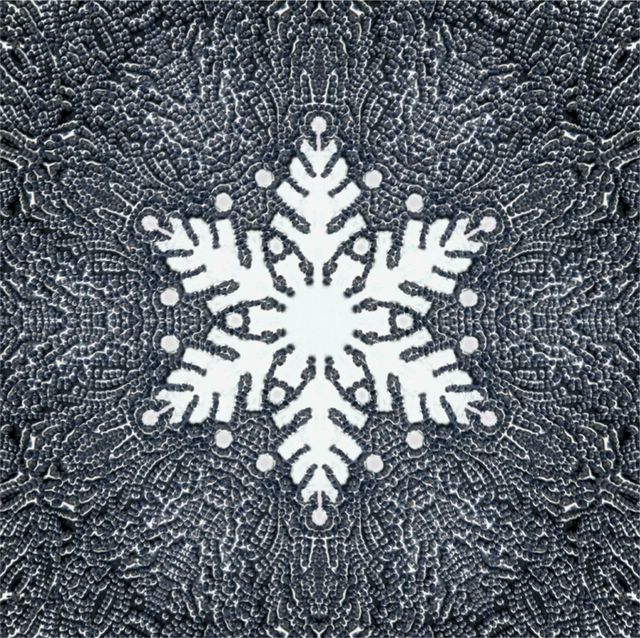
This image is the improved snowflake that I used for my Christmas cards. I did the first one very quickly the night before the EG meeting, but this one took a bit longer. It was embroidered on a coke can, scanned and then copied and pasted 12 times with a bit of flipping. Then I touched it up to clean up the flake.
Sketch Book Notes
Sketch book Pages 5/2/05
Liz Welch
Creating pages for you own sketch / scrapbook is rewarding and fun. Below are some pointers to remind you and guide you through creating pages. At the May meeting Chrissie will be covering ideas for making up the books and adding words.
Preparation
Scan in items, more than one up on the screen, you can select and cut and paste into your pages at will.
Consider the size and shape of the sketch book you want to end up with.
Beginning the pages
Choose page size (image/ resize/ image size) and the resolution (300dpi is fine). Some times I make the canvas size bigger than my finished page to allow for cropping and positioning.
Background layer
This can either be something from your source material or a bucket fill or pattern from within the programme.
Bring in the first object
Select something from your scanned objects using the appropriate tool (often the magic wand will do, remember to set the tolerance levels and whether you want it to be contiguous) Any background you include will be visible in the sketchbook page, so take care to select only the bits you want.
Cut and paste into the new page, it will appear as a new layer (open the layers palette and keep it on the desk top by dragging it onto the work area). If you have selected an Image with no background detail then you will see a checkerboard in the layer which indicates transparency.
Label the layer by double clicking on the box to the right of the eye in the palette.
Manipulate as you choose
Scale changes – move tool, drag out corners/ sides, rotate etc
Apply filters
Apply blending modes
Apply layer styles
Consider the opacity of the layer
Subsequent Layers
Select, copy and paste in any other objects, type text, paint, draw shapes etc
Consider all of the possible manipulations plus try changing the order of layers by dragging and dropping in the layers palette.
Use the Tools Menu
Eraser set to 15% (approx) (don’t forget that you have a huge choice of brush options) is a useful tool to gently rub away areas of a layer to reveal or more subtly blend in opaque layers
Burn And Dodge tools enhance the areas that you choose, not the whole layer.
Blurring and reducing the saturation can also be effective.
The selection tools allow you to choose which parts of a layer you adapt.
Working with layers
· Naming layers will reduce confusion
The layer you are working on is the one highlighted with blue.
Layers with no eye visible are hidden, click on the layer (in the palette) to make it visible again
If nothing appears to be happening when you use a tool on a layer check that
1. You are on the layer you think you are.
2. You have no selection active – go to select/ deselect. Even if you can’t see the actual selection on screen, if the deselect option is not greyed out then you actually do have a selection there, so get rid of it.
· Use the Select All/ edit/ copy merged/ edit/ paste to create a fresh layer which contains all of the images and effects of the layers beneath it (you can choose which layers to include by blinking out the eyes on the layers you don’t want included). You can blink out all the lower layers and work on creating new layers above, in the knowledge that your lower layers are safe NB this does not preclude the need for regular saving of your files in case of a crash.
Ready to Print
When the page is finished make sure it is the right size for your sketchbook page (image/ resize/ image size).
If you are not intending to revisit the page and make changes then merge the layers or flatten the image to reduce the file size. Save it in whatever format suits, eg Tiff or jpeg. (PSD files are bigger and some image viewers won’t open them)
If you think you might want to change it at a later date, merge just those layers that you know you don’t want to mess with and save it as a PSD file (all your layer info will remain) I often have both a PSD and a Tiff of the same image.
Print out onto suitable paper, there are many art papers besides the normal photo papers available including watercolour, pastel paper, canvas and various textures, besides the option of fabric, tissue, acetate, shrink plastic, transfer paper, velvet paper etc. (visit www.craftycomputerpaper.co.uk for a few ideas)
Monday, January 31, 2005
Blimey!
Well hello there, aren't you the clever one. I am still not sure what a blog actually is and whether I have done the right thing, but you obviously have.
Love the chameleon
Love the chameleon


Subscribe to:
Posts (Atom)


